
Background jobs play a pivotal role in efficiently handling various tasks without requiring direct user interaction. These tasks may include batch jobs, CPU and I/O-intensive processes, and long-running workflows. By offloading such tasks to background jobs, applications can enhance availability, reduce response times, and optimize resource usage, resulting in an uninterrupted user experience. Users can continue to interact with the application while essential processes like image thumbnail generation or order processing take place behind the scenes. This blog post outlines the best practices for setting up a serverless background job workflow for Next.js apps, covering scheduler setup, task queue implementation, monitoring, and background worker source code management.
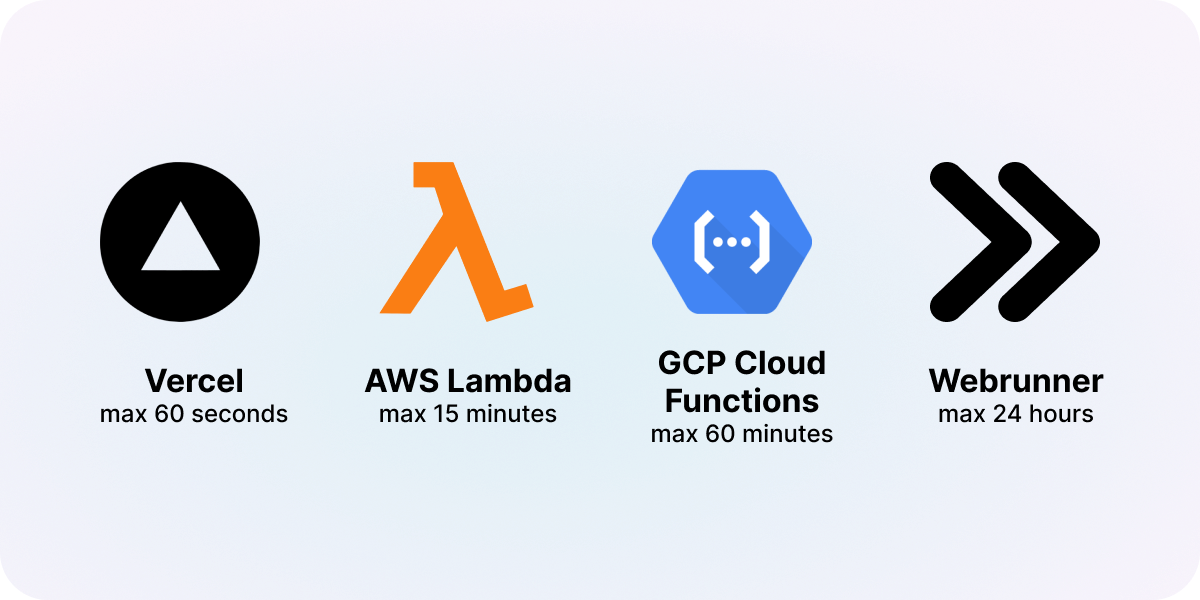
Although Vercel is an excellent option for hosting front-end applications and serverless functions, it may not be the best fit for long-running background jobs due to its 60-second timeouts (10 seconds for Hobby projects). If your background tasks require more time to complete, you might need to explore other alternatives.
The top cloud providers (AWS, GCP, Azure) have longer maximum timeouts for their serverless functions. For example, AWS Lambda offer a maximum timeout of 15 minutes, while Google Cloud Platform (GCP) Cloud Run provides a maximum timeout of 60 minutes. Here's a high-level outline of how you can set up a background worker independently on one of these platforms:
Check out our guide on deploying a Next.js background worker to GCP Cloud run.
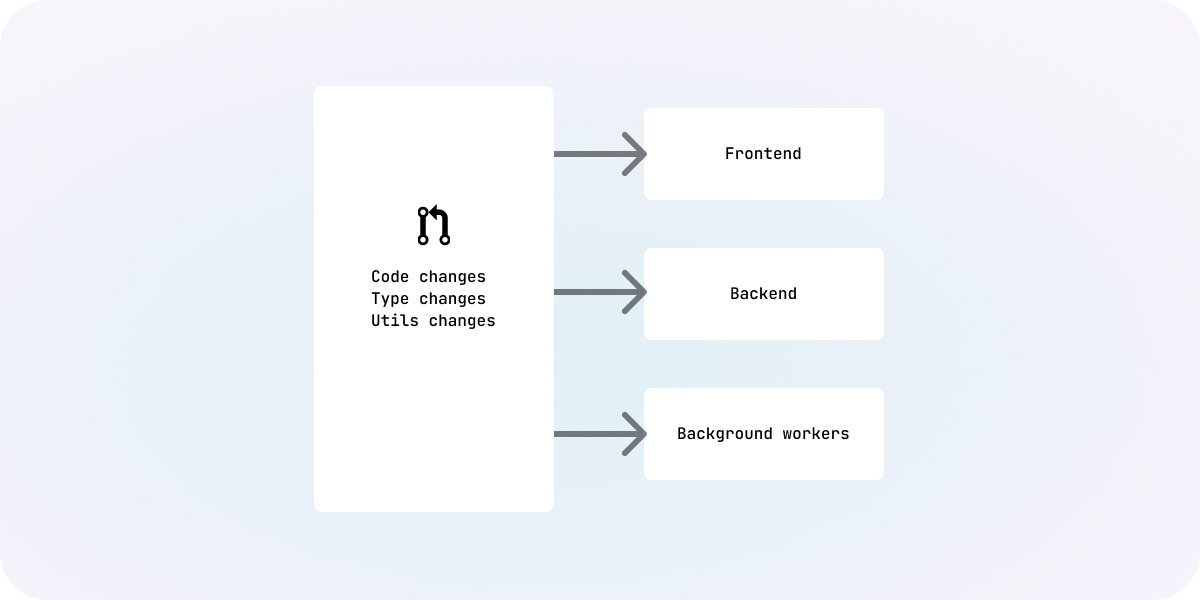
When setting up a background worker for your application, one crucial decision you'll face is whether to use shared code (the same Next.js app) or maintain a separate codebase for the background worker. We recommend using shared code. This approach offers several advantages, promoting efficiency and collaboration:
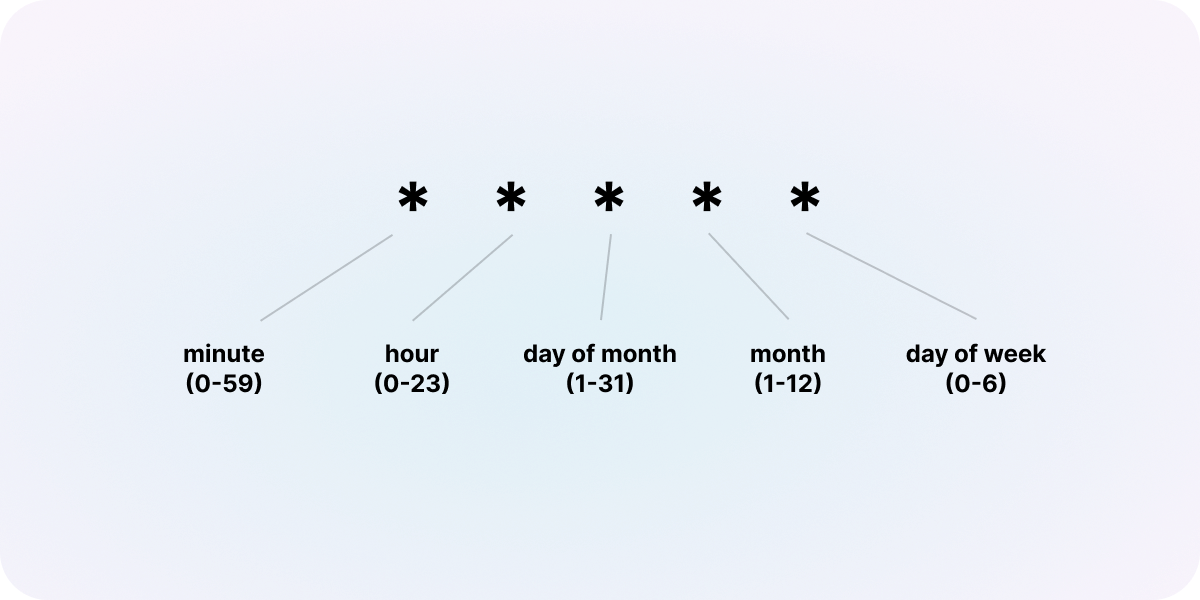
Background jobs can be triggered by either a scheduler or user action. Schedulers are particularly useful when tasks need to be performed at regular intervals or on a time-based schedule. These actions are typically used for tasks that involve iterating over all user accounts or data. For example, you might have a background job that performs a daily backup of user data or sends out weekly email reports.
Vercel cron jobs provide a convenient way of defining schedules directly within your version controlled repository. However, there is again a maximum runtime limitation of 60 seconds on Vercel. In comparison, cloud providers such as AWS and GCP offer longer run times for jobs. Setting up scheduled jobs on these platforms involves navigating through admin dashboards or setting Infrastructure as a Service (IaaS) like Terraform.
Using a task queue such as GCP Pub/Sub or AWS Simple Queue Service (SQS) is a more efficient way to manage background jobs compared to spinning up new invocations for each task. When a user initiates an action that requires background processing, the application can push the task to the queue. The background job workers then consume tasks from the queue and execute them independently. This decoupling of task execution from user interactions ensures smoother and more scalable performance, especially during peak loads. It also allows for better fault tolerance, as tasks can be retried in case of failures.
To set up a task queue for background job processing, follow these general steps:
If you're setting up a queue with cloud providers, you may want to consider using IaaS tools like Terraform to commit this configuration into version control. This enables better version tracking and facilitates seamless replication across multiple environments.
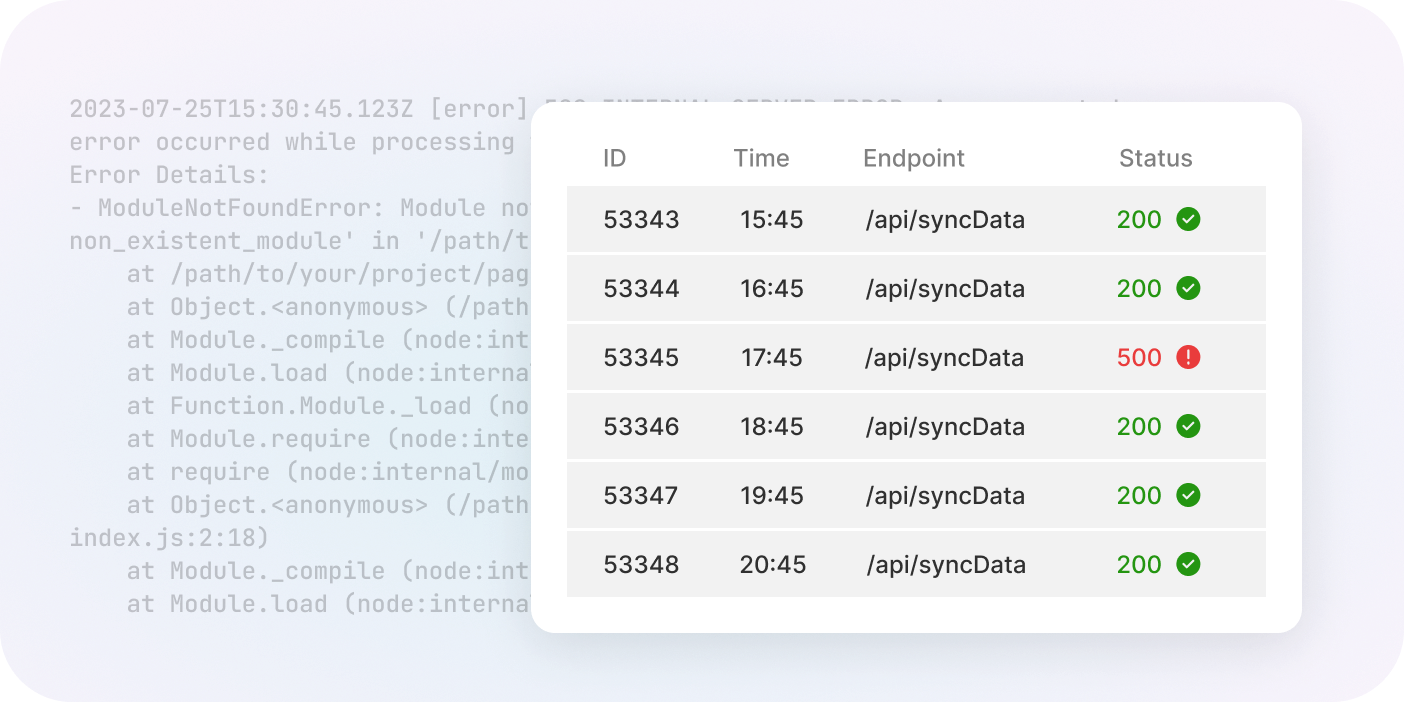
Monitoring is essential to keep track of the status, outcome, and logs of background jobs. For example, you might want to know if a specific job succeeded or failed, how much time it took to execute, or whether there were warning messages in its logs. Both Google Cloud and AWS offer built-in monitoring solutions. In Google Cloud, you can use Stackdriver Logging to automatically log Cloud Function activity. In AWS, Lambda automatically logs function activity, and you can access these logs through CloudWatch. Additionally, you can implement custom logging within your background job code to capture specific details.
In addition to monitoring logs for internal debugging, you may want to provide transparency to your users by displaying the status of background jobs on the frontend. This can be particularly helpful for tasks that directly impact the user experience, such as processing user-generated content or handling important transactions. To achieve this, you'll want to consider the following steps in broad stokes:
Webrunner is a platform that simplifies the deployment of background workers. By linking your GitHub repository to Webrunner, you can seamlessly deploy your background worker with minimal or even no-code effort. Here's how easy it is to get started:
With Webrunner, you gain a host of powerful features that simplify background job management. For instance, it offers a maximum timeout of 24 hours - longer than most other options - allowing your background tasks to run more extensive and long-lived operations without any hassle.
Moreover, Webrunner works seamlessly with the same repository that powers your Next.js app. This means you can conveniently manage and coordinate both frontend, backend, and background tasks within a single codebase, without requiring any additional code to deploy tasks on Webrunner alongside your current Next.js repo.
Defining scheduled background jobs is made easy with Webrunner. You have the flexibility to use a user-friendly UI or a JSON configuration file in your source code to specify and manage scheduled jobs. This enables version-controlled scheduled jobs and allows you to take advantage of longer run times, extending up to 24 hours.
Additionally, Webrunner handles the task queue setup for you. Once your Next.js app is deployed on Webrunner, you can effortlessly access your Next.js endpoints through straightforward URLs like https://run.webrunner.io/{appId}/api/your/Endpoint. By utilizing the Webrunner API, you can query the status of each task, providing real-time insights to your end users, allowing them to stay informed and updated on task progress.
Learn more about Webrunner and try it out today at webrunner.io.